Back to Safety Center Main Menu
Assigning Groups to Plans
Once a file has been successfully uploaded, the Portal Administrator can log into the Portal and start assigning the uploaded groups to each plan that needs to use this type of authentication.
-
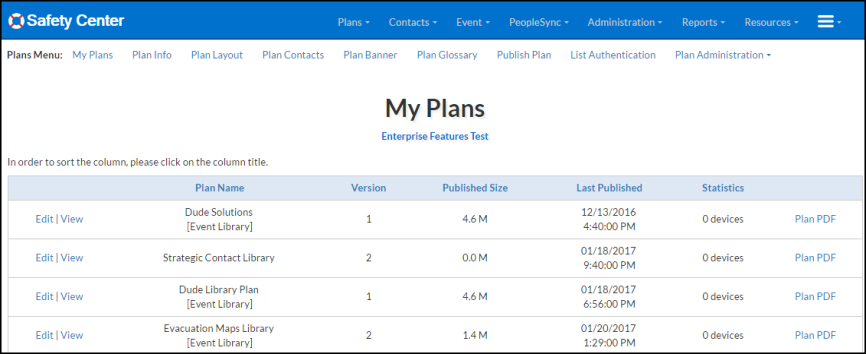
- Click on the Plans tab and then click on My Plans to select a plan.
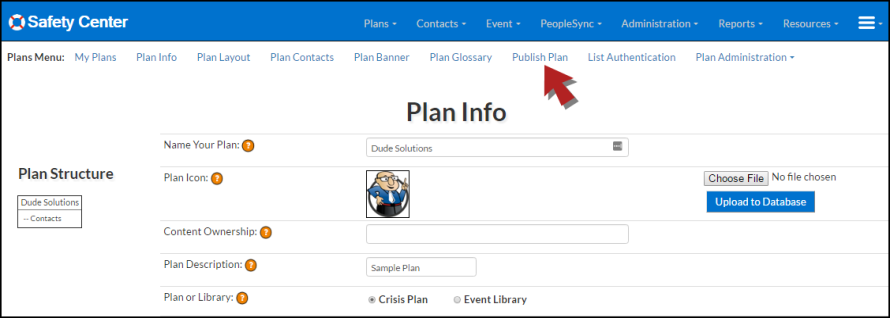
- Once you have selected a plan, if there are no changes to be made to the plan, click on Publish Plan from the Plans Menu.
- On the Publish Plan page, change Plan Access Control to either of the Listed Users access control options and click the Save Changes button.
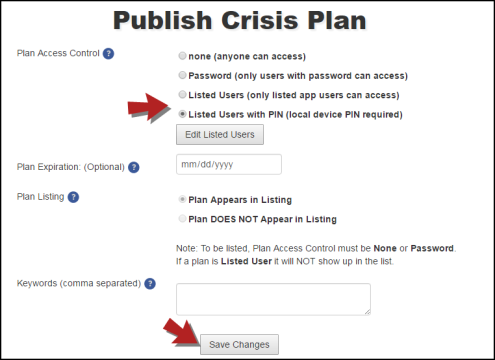
- After saving your changes, click the Edit Listed Users button.
-
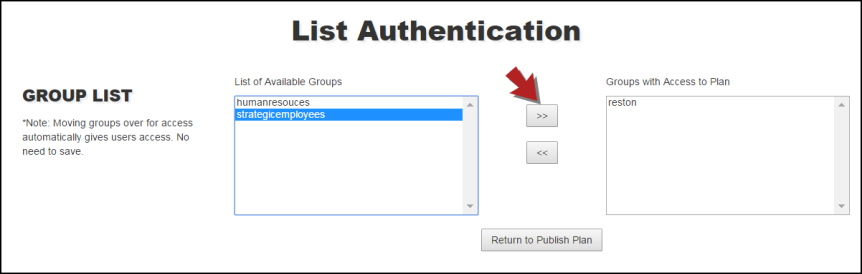
On the List Authentication page, use the Group List section to enable plan authentication with groups. The left hand column shows groups available for this plan.
- Select the groups you want to have access to the plan, and click the top >> button.
- Once you are done adding groups, click the Return to Publish Plan button and publish the plan. This will ensure that only the users in the groups specified on the List Authentication page will have access to the plan.